
Get started with Govform
Create a practice service, find your way around Builder, edit some content and try the journey in User view. This is the first of three tutorials.
Sign in to Govform and choose a library where you can create and edit services. Use fictional details throughout these tutorials. The screenshots show the current Builder in dark mode; your library name, branding and available products may differ.
1. Create a service
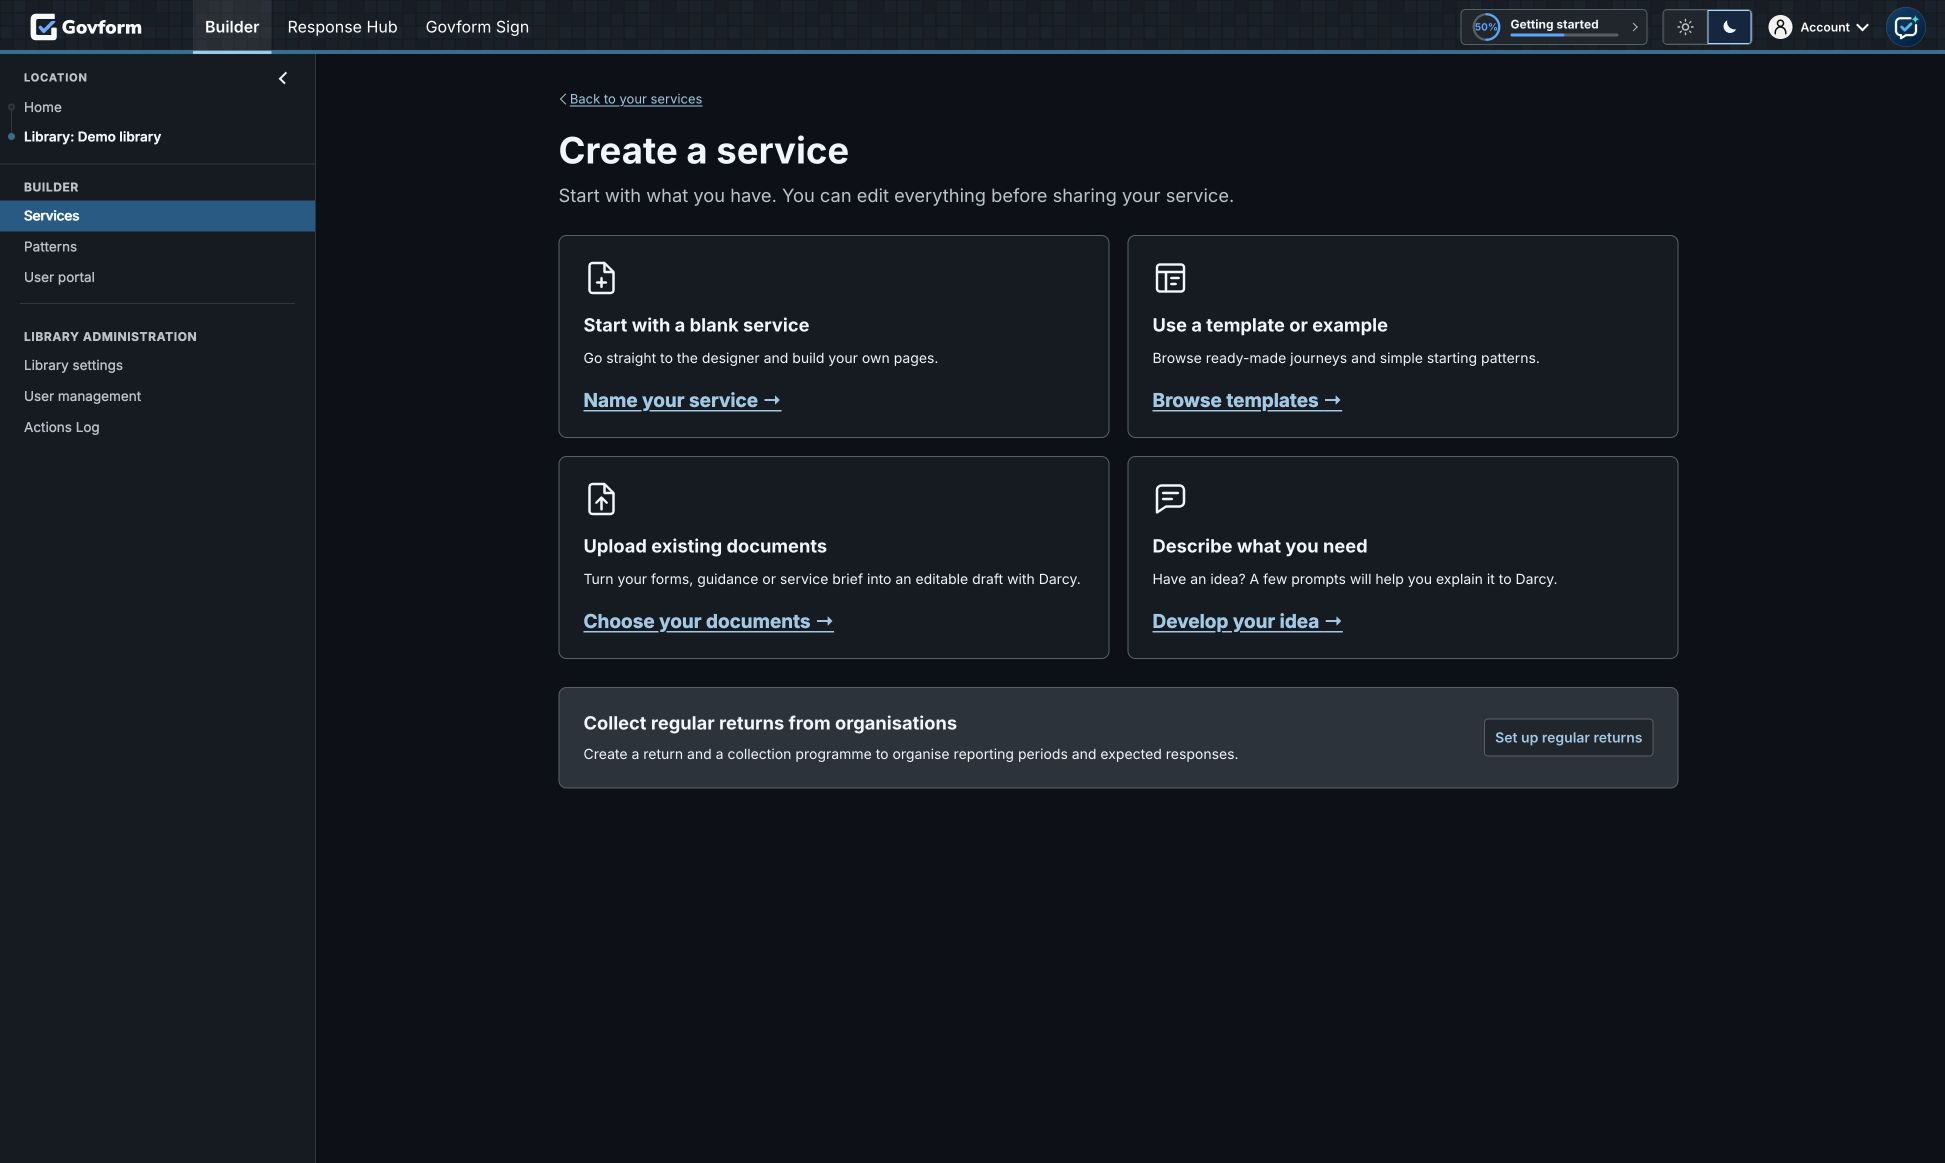
- Open your library and select Services in the Builder sidebar.
- Select Create new service, then Use a template or example.
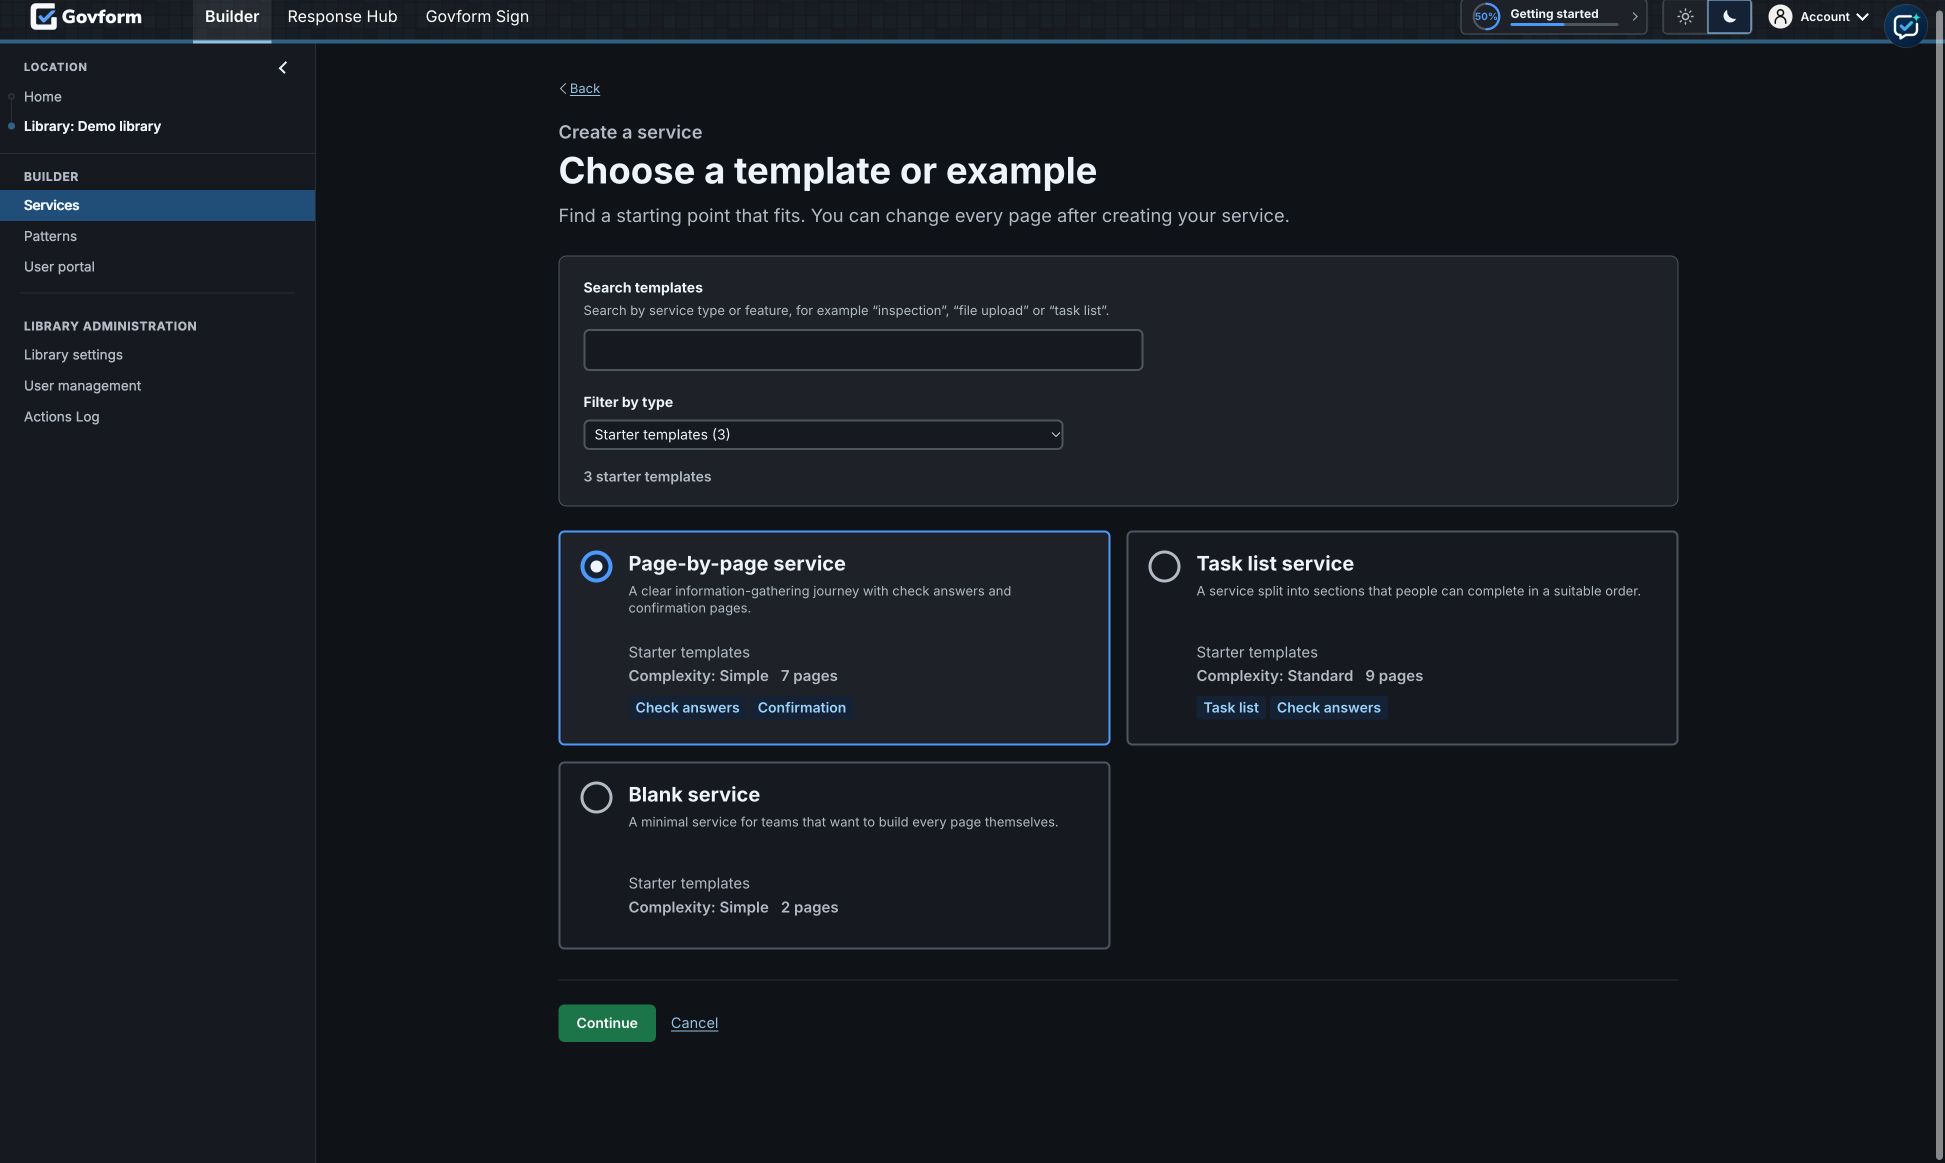
- On Choose a template or example, set Filter by type to Starter templates. Choose Page-by-page service and select Continue.
- Enter a service name, such as “Tutorial 1 — first service”. Builder can generate the service ID from the name. To choose it yourself, expand Change the service ID; start with a lower-case letter and use lower-case letters, numbers and hyphens. The ID must be unique in this library.
- Select Create service.
2. Explore the service
The new service opens in Service content. Use List for its pages and submission workflow, or Flow for a diagram of the routes. Select a page in the left sidebar to edit it. To return to the overview, select the service name in the sidebar’s Location trail.
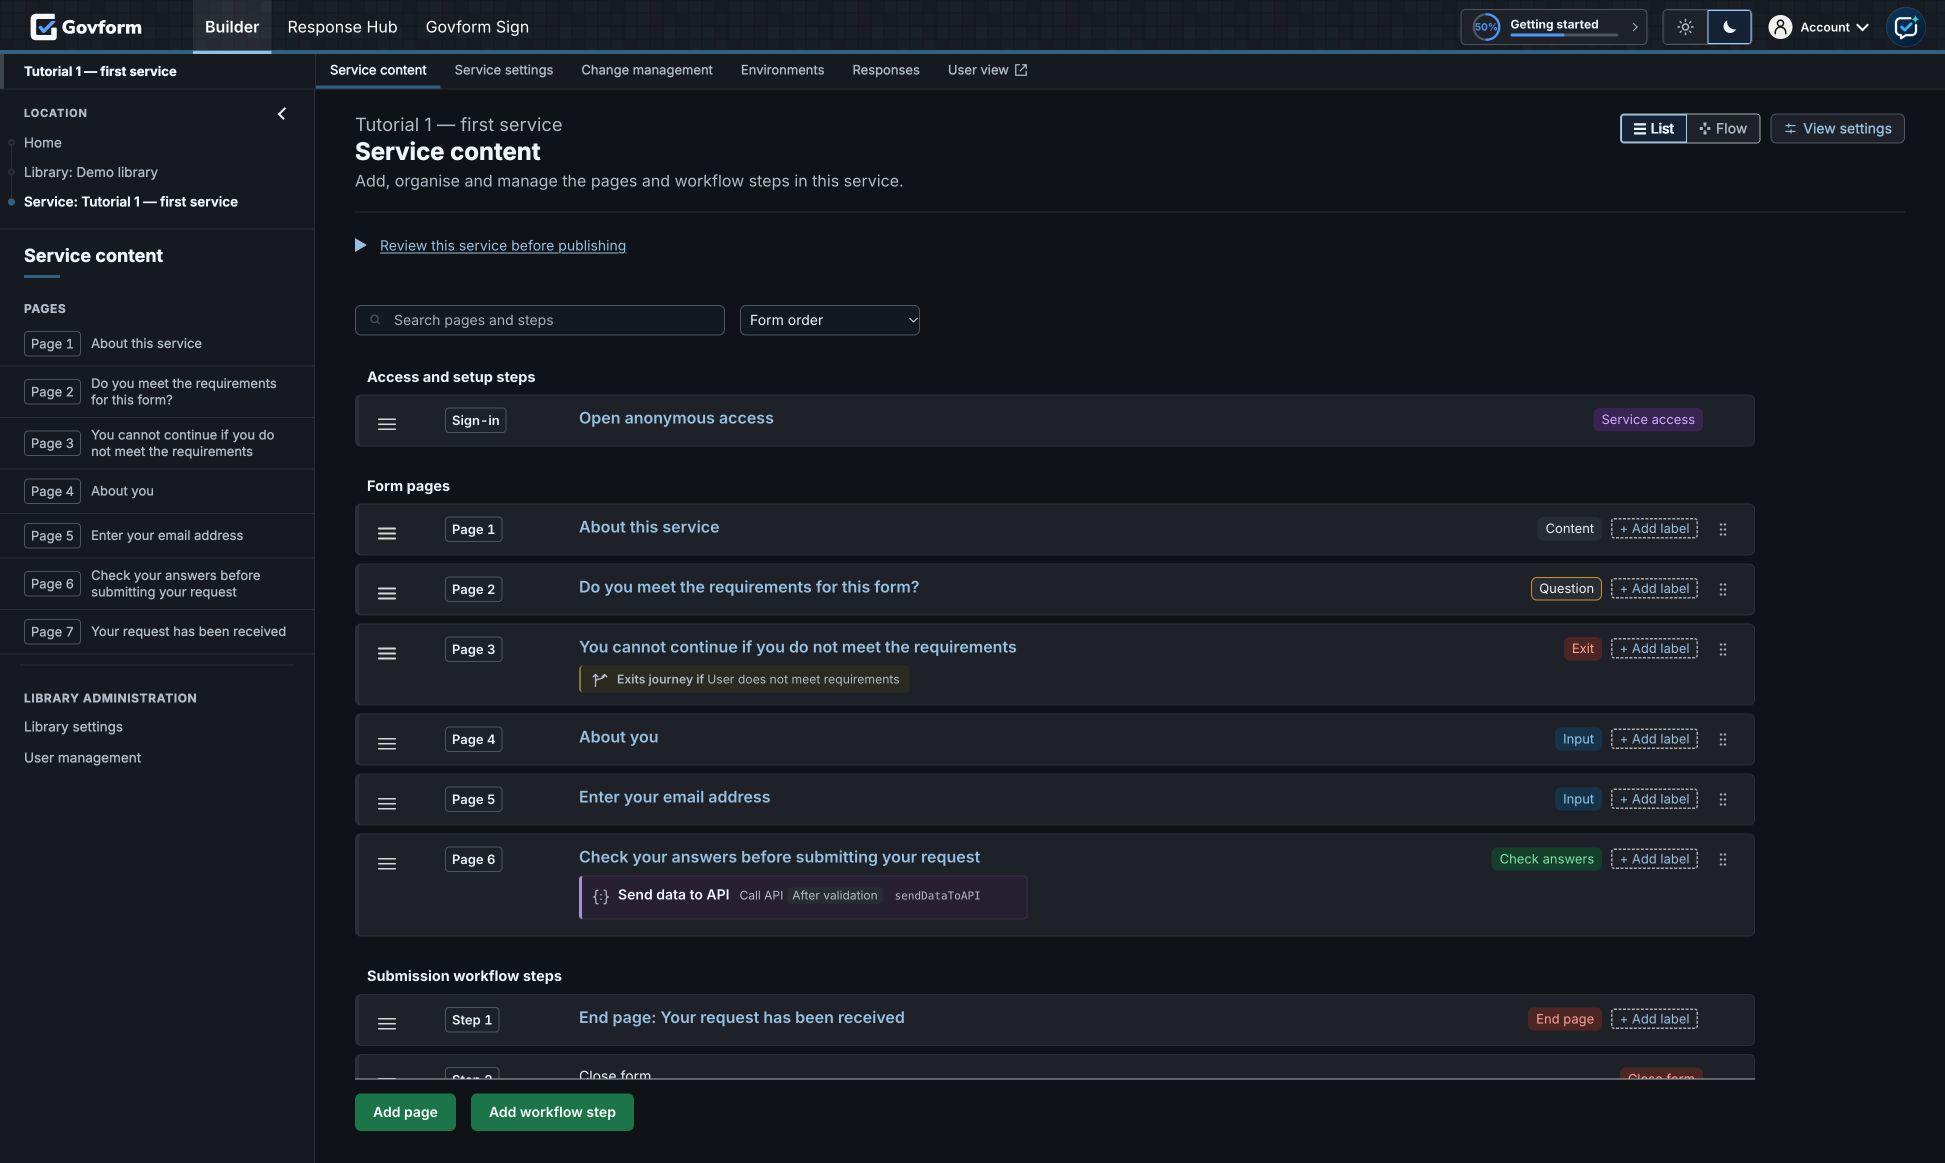
Open Page 1: About this service. Beneath the selected page, the sidebar shows Page content, Page settings, Page flow conditions, Page validation and Page actions. Selecting a component on the page opens its own settings pane on the right.
3. Update content
- In Page content, select the introductory text to open Standard content settings.
- Under Content, choose Text mode. Replace the placeholder with: “Use this practice service to explore Govform. You can try the questions, check your answers and submit a test request.” Add a second paragraph: “Use fictional details while you learn.”
- Click outside the editor and wait for the settings pane to show Saved. The page preview updates with the saved wording.
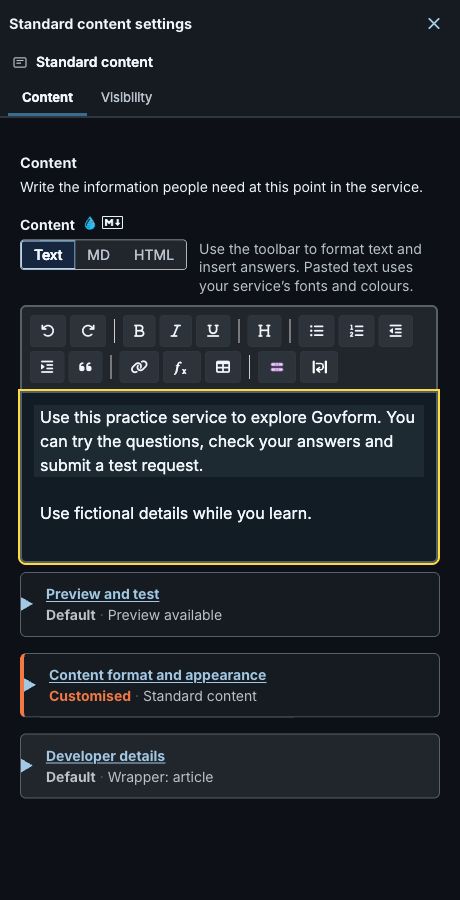
Component settings in the side pane save automatically. Other screens and dialogs have buttons such as Apply, Apply changes or Apply update; use the save control shown on that screen before moving on. Text mode is an editor, so use the page preview or User view to check the rendered result.
4. Test in User view
- Select User view in the service navigation. It opens the prototype in another tab.
- Check the edited introduction, then select Continue. Try continuing without answering the requirements question to see the required-answer error.
- Choose Yes and complete the sample questions with fictional details. Check the Back and Change links, then submit the practice request and check the confirmation.
- Open User view tools → Reset prototype, then select Clear data and restart. Try the requirements question again with No; you should reach the exit page.
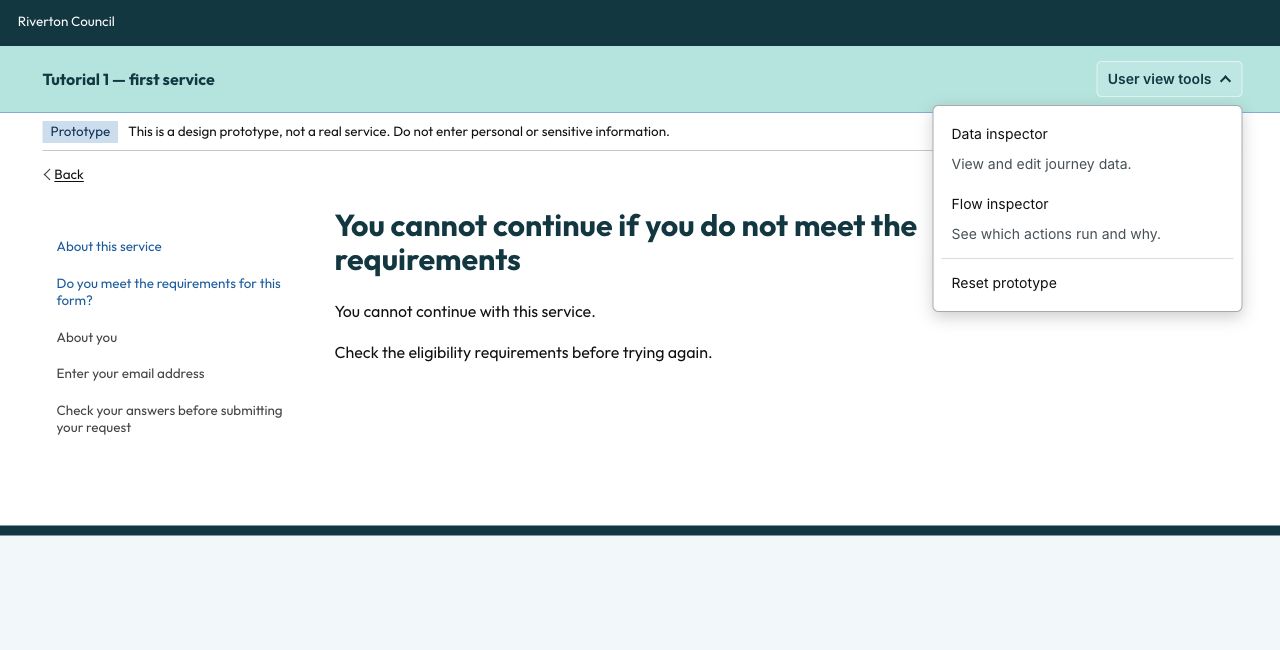
User view tests the current saved design. It simulates integrations: it does not send real emails or call external systems. After editing Builder, refresh or restart the prototype as needed and repeat the affected steps.
What you learned
- Create a service with the current template picker.
- Move between the service overview, pages and component settings.
- Edit content and recognise when it has saved.
- Test successful, invalid-input and exit routes in User view.
Continue with Uploads and conditional page flow.