
Pre-population, validation and testing
Continue from Uploads and conditional page flow. You will pre-fill an answer from an earlier page, add a validation condition, inspect journey data and review versions before a QA release.
The calculation uses a fixed 20% rate as a learning example, based on the claim amount excluding VAT. Replace the sample rule with your service’s actual requirements before using it for real claims.
1. Work from a copy
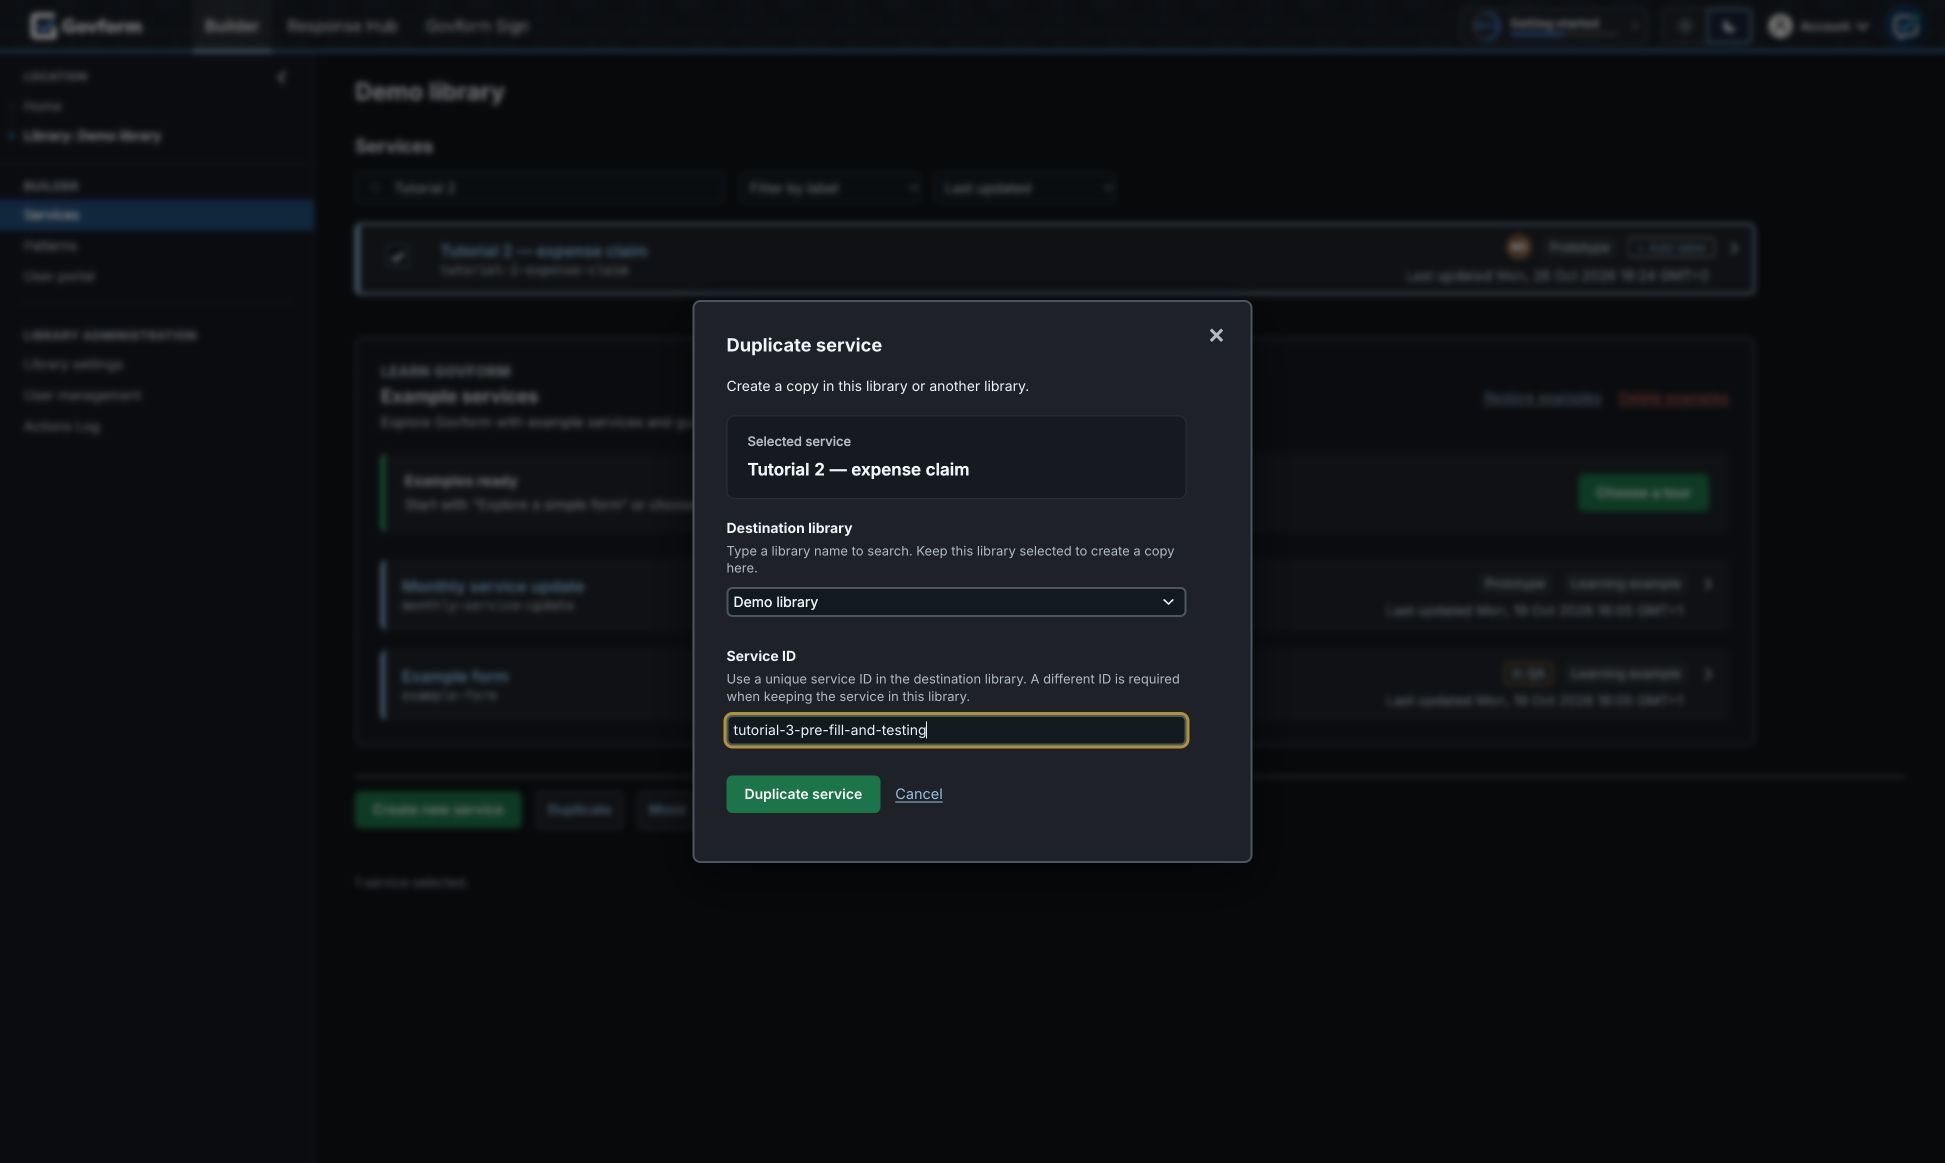
- Return to your library’s Services list. Tick the checkbox for your Tutorial 2 service, then select Duplicate.
- Keep the same Destination library, enter a new Service ID such as
tutorial-3-pre-fill-and-testing, and select Duplicate service. - Open the copy. In Service settings → Service details, set its name to “Tutorial 3 — pre-fill and testing” and select Apply.
claimAmount and vatAmount.2. Put VAT on the following page
For this example, the claim amount must be saved before the VAT page opens. Moving the existing component preserves its ID and validation settings.
- Open “About your claim” and select Add next page → Empty page. Title it “VAT amount for your claim”, then select Add page.
- Return to “About your claim”. Open the Component menu beside the VAT amount component and select Cut component.
- Open the new VAT page and select Paste component from page 4 (the page number reflects its source). “About your claim” should now contain only
claimAmount, withvatAmounton the next page.
3. Pre-fill VAT
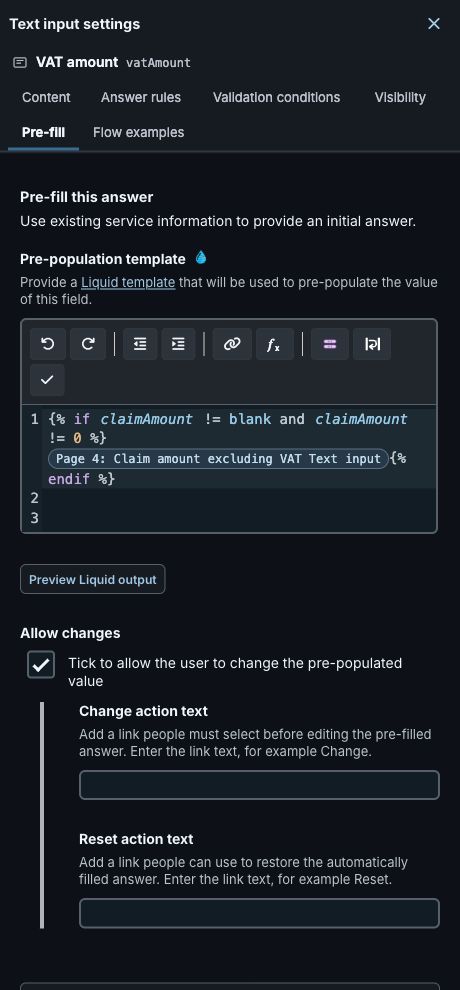
- Select the VAT amount component and open Pre-fill.
- Enter this Pre-population template:
{% if claimAmount != blank and claimAmount != 0 %}{{ claimAmount | times: 0.2 | round_fixed: 2 }}{% endif %}Leave Allow changes enabled so you can test validation next. Click outside the editor and wait for Saved. This example uses a previous page’s saved answer, so leave in-page recalculation off.
Open User view and follow the valid-receipt route. Enter 100 for the claim amount and select Continue. The next page should show 20.00. Starting a fresh test with 19.99 should give 4.00.
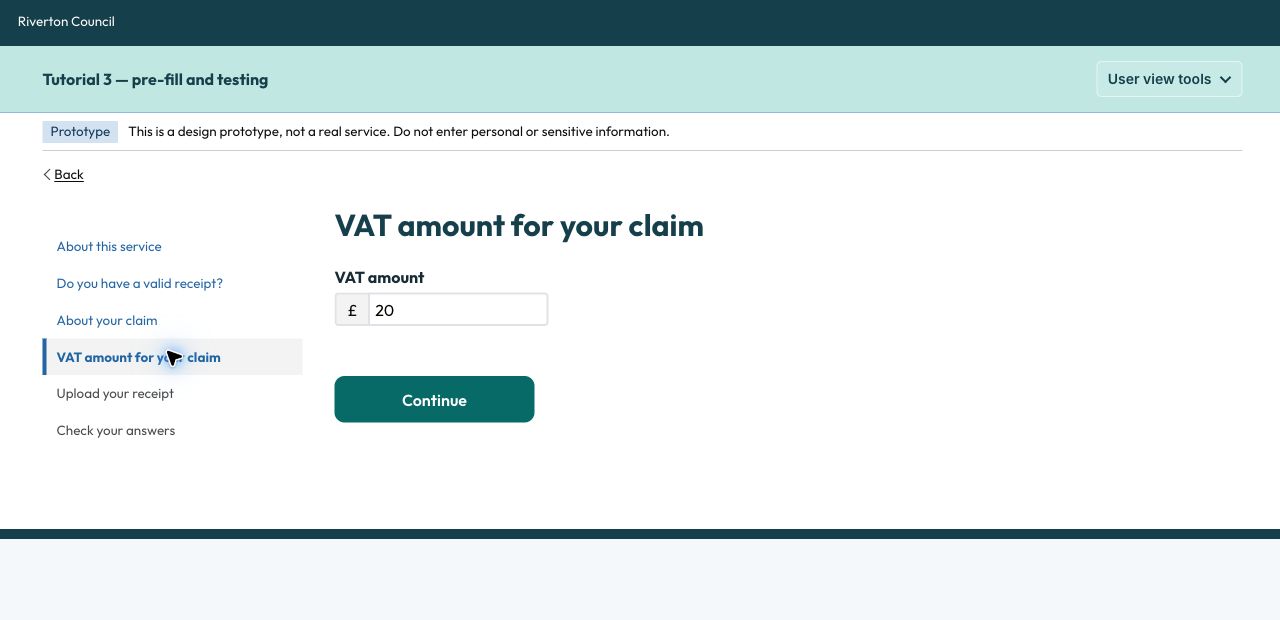
The template returns nothing for a blank or numeric zero input. The claim amount’s required and minimum-value rules reject those inputs before this page. A user’s explicit override is an answer in its own right; check it when they change an earlier amount rather than assuming pre-fill always replaces it.
4. Validate the edited answer
- Open Service settings → Conditions → Add condition. Name it “VAT matches the tutorial calculation”, use
vatMatchesCalculationas its ID, choose Template, and select Continue. - In Condition template, enter the following and select Apply:
{% assign expectedVat = claimAmount | times: 0.2 | round_fixed: 2 %}
{% assign enteredVat = vatAmount | plus: 0 | round_fixed: 2 %}
{% if enteredVat == expectedVat %}true{% else %}false{% endif %}- Return to the VAT page, select its component, then open Validation conditions. Choose Use saved conditions and add “VAT matches the tutorial calculation”.
- Set Error message to “Enter 20% of the claim amount excluding VAT for this tutorial.” Wait for Saved in the side pane, or select Apply changes if you opened the full settings screen.
- In User view, try changing VAT from
20.00to19and continuing. Check the custom error, then enter20and confirm you can continue.
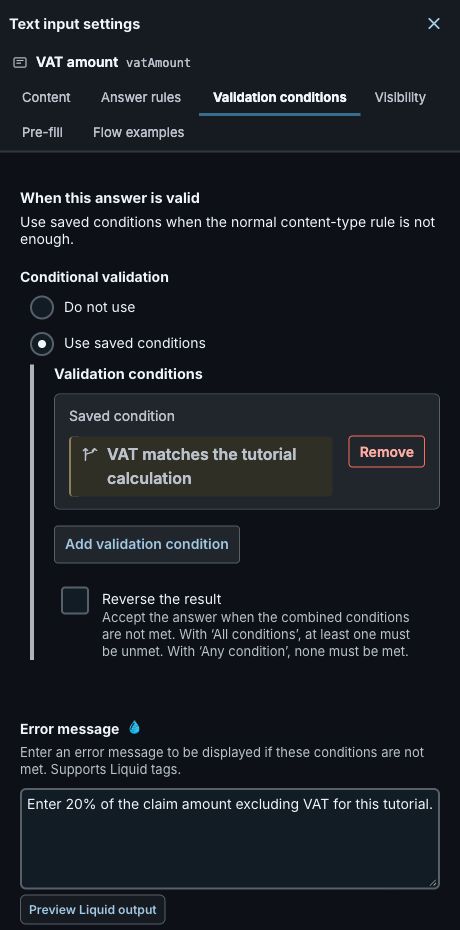
The template compares both amounts rounded to two decimal places, so 20 and 20.00 are treated alike. This condition validates the field; it does not decide whether the VAT page is shown.
5. Use the data inspector
- Enter and continue past the claim and VAT pages in User view so the journey has saved values.
- Open User view tools → Data inspector. In Form data explorer, find
claimAmountandvatAmount. Check their IDs and values. - Paste the pre-fill template into Liquid template tester → Template, choose Evaluate as → Value, and select Evaluate template. With a claim amount of
100, the result should be20.00.
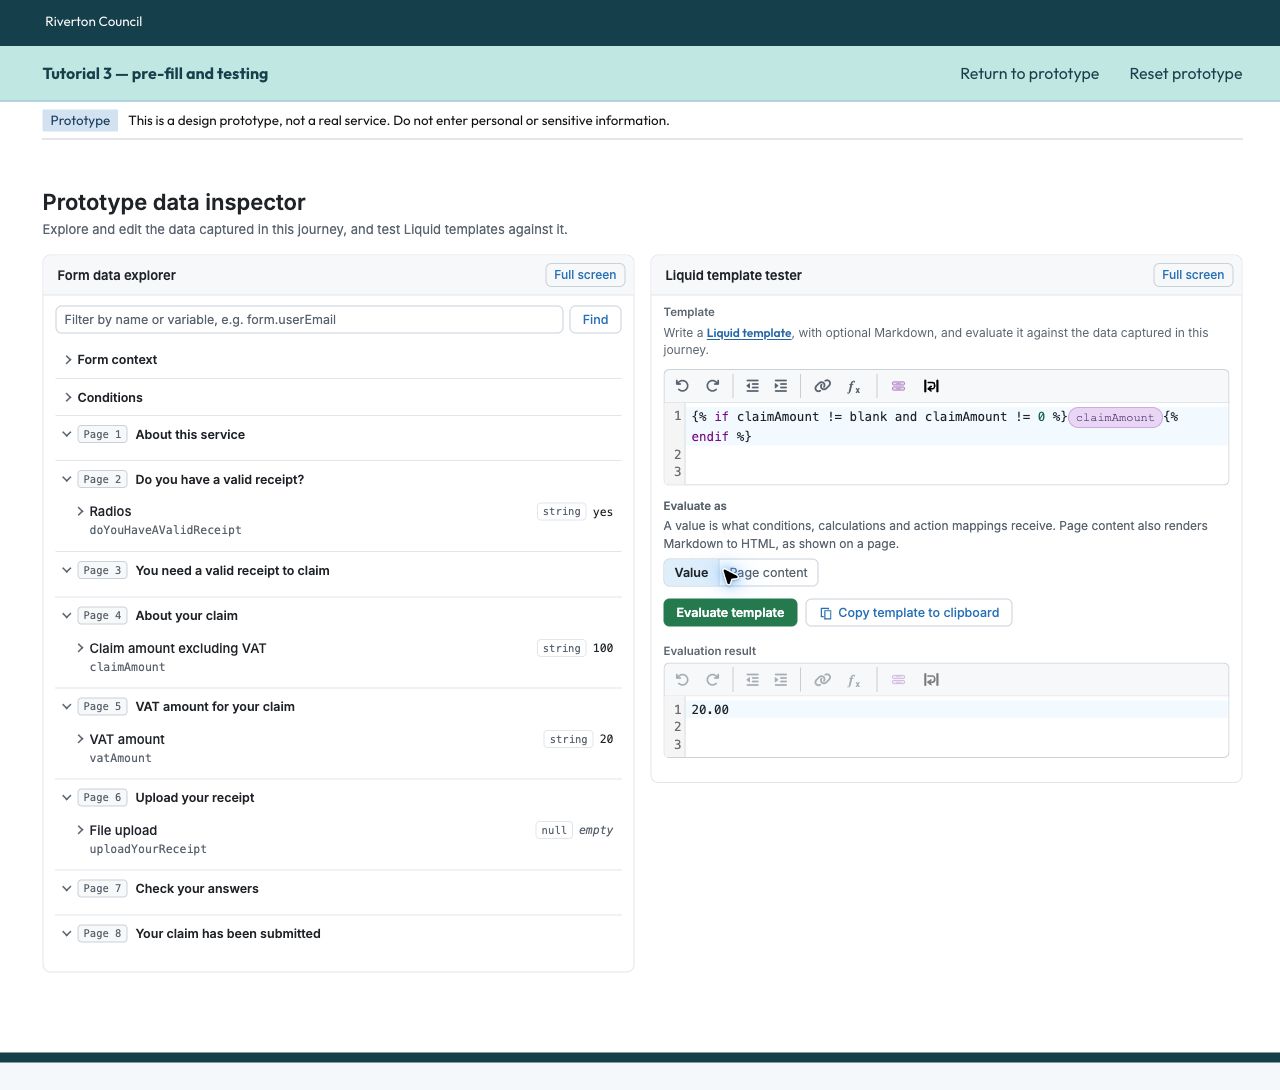
You can also use Preview Liquid output beneath a component’s template to open the tester with that expression. It may open a different prototype journey; check its captured values first. Testing an expression does not save it back to the component.
6. Review version history
Open Change management. The Publishing status cards compare the current draft with deployed environments. The Change history table records saved changes, including automatically saved component edits.
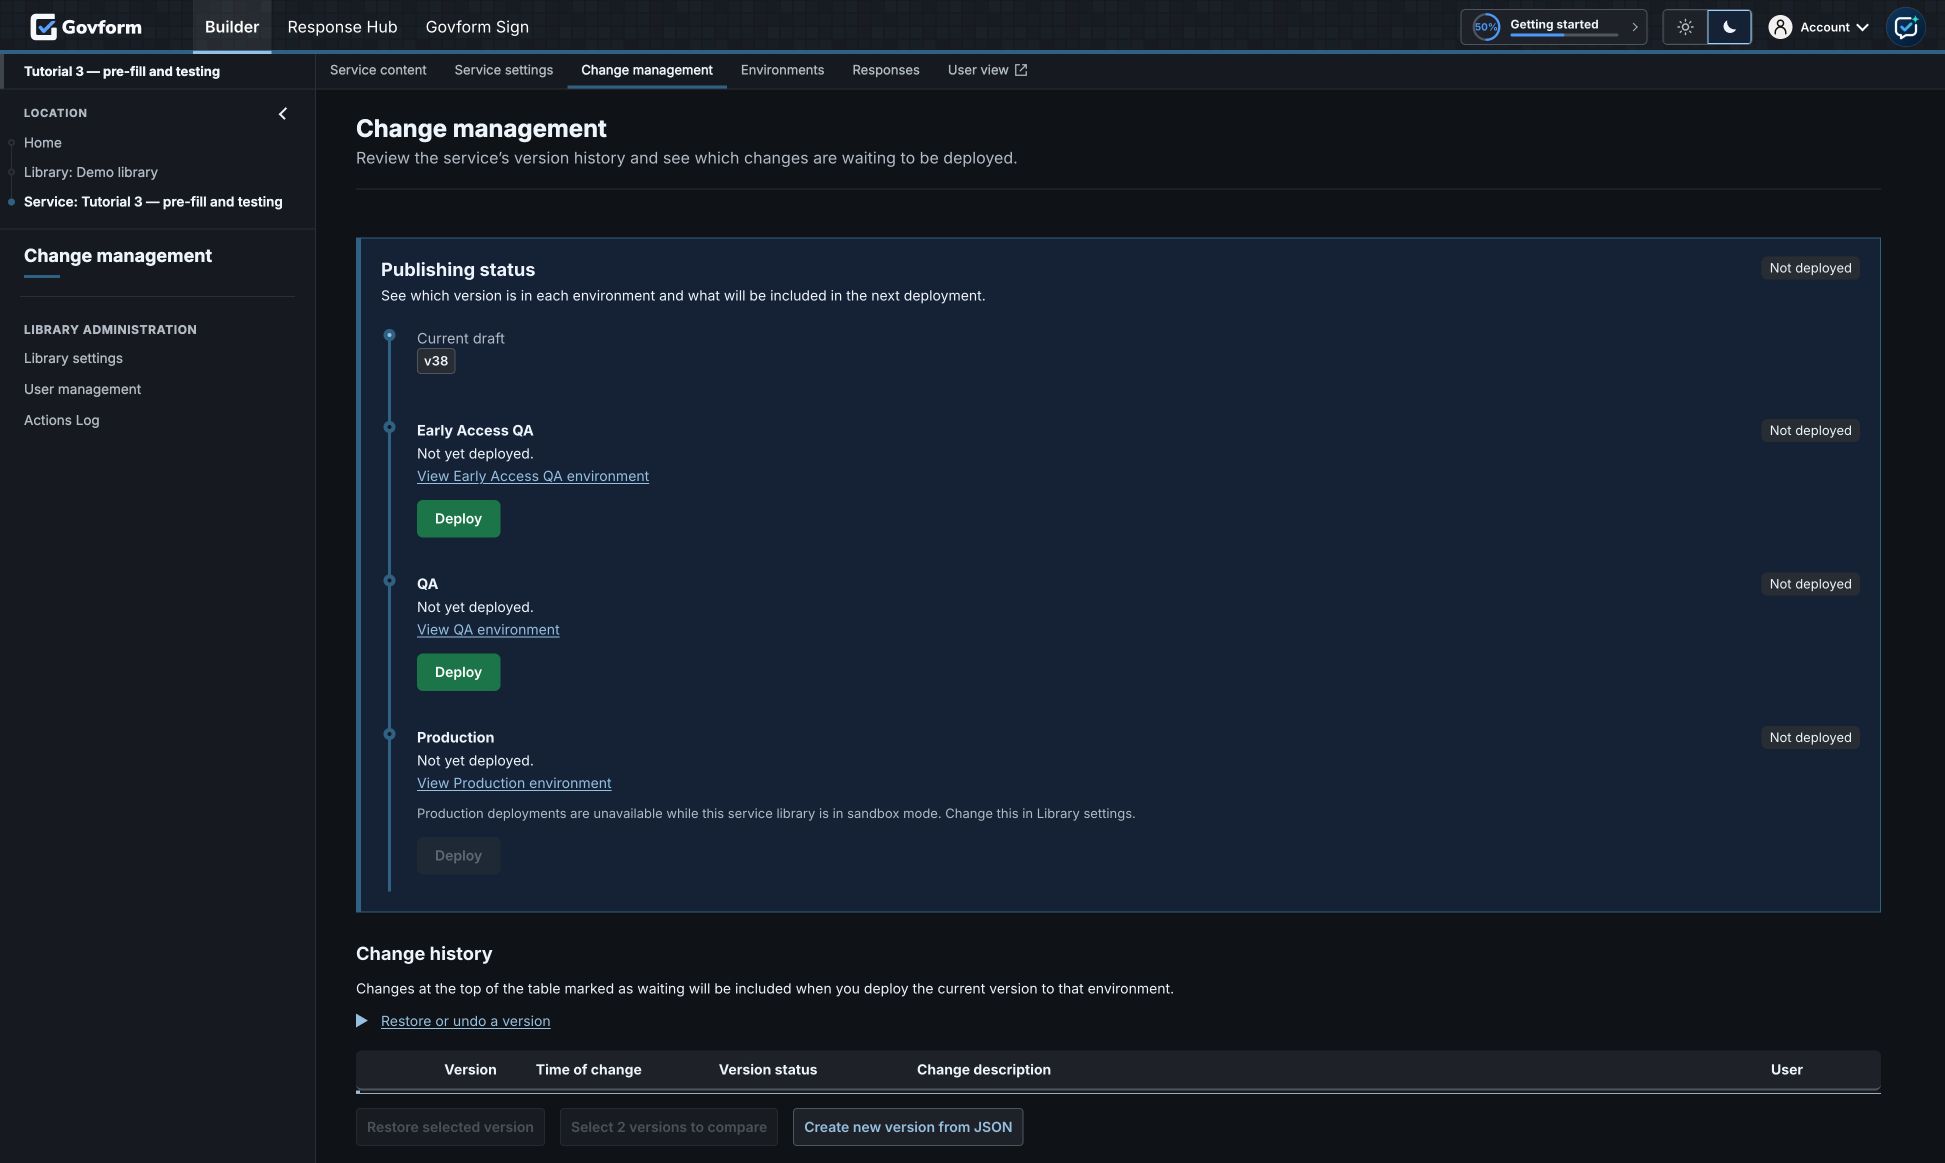
Select two version checkboxes and choose Compare selected versions to inspect their differences. Undo latest change and Restore selected version change the Builder draft; they do not deploy that design. Review the selected version and the confirmation before restoring. You do not need to restore anything to complete this tutorial.
7. Test and review a QA release
First complete the User view journey through upload, check answers and confirmation. Repeat the two receipt exit routes, missing and invalid values, rounding, Back links and changes from Check your answers. Use User view tools → Reset prototype → Clear data and restart for independent test cases.
- When you have permission to publish a test version, open Environments → QA environment.
- Select Deploy to QA. In the Deploy to QA? dialog, review Select version to deploy to QA and the service name. Choose the tested version offered by the picker.
- Select Deploy service only when you intend to publish that version to QA. To practise reviewing the release without deploying it, select Cancel.
- After an intended deployment finishes, use the QA service link shown by Builder and repeat the relevant tests there.
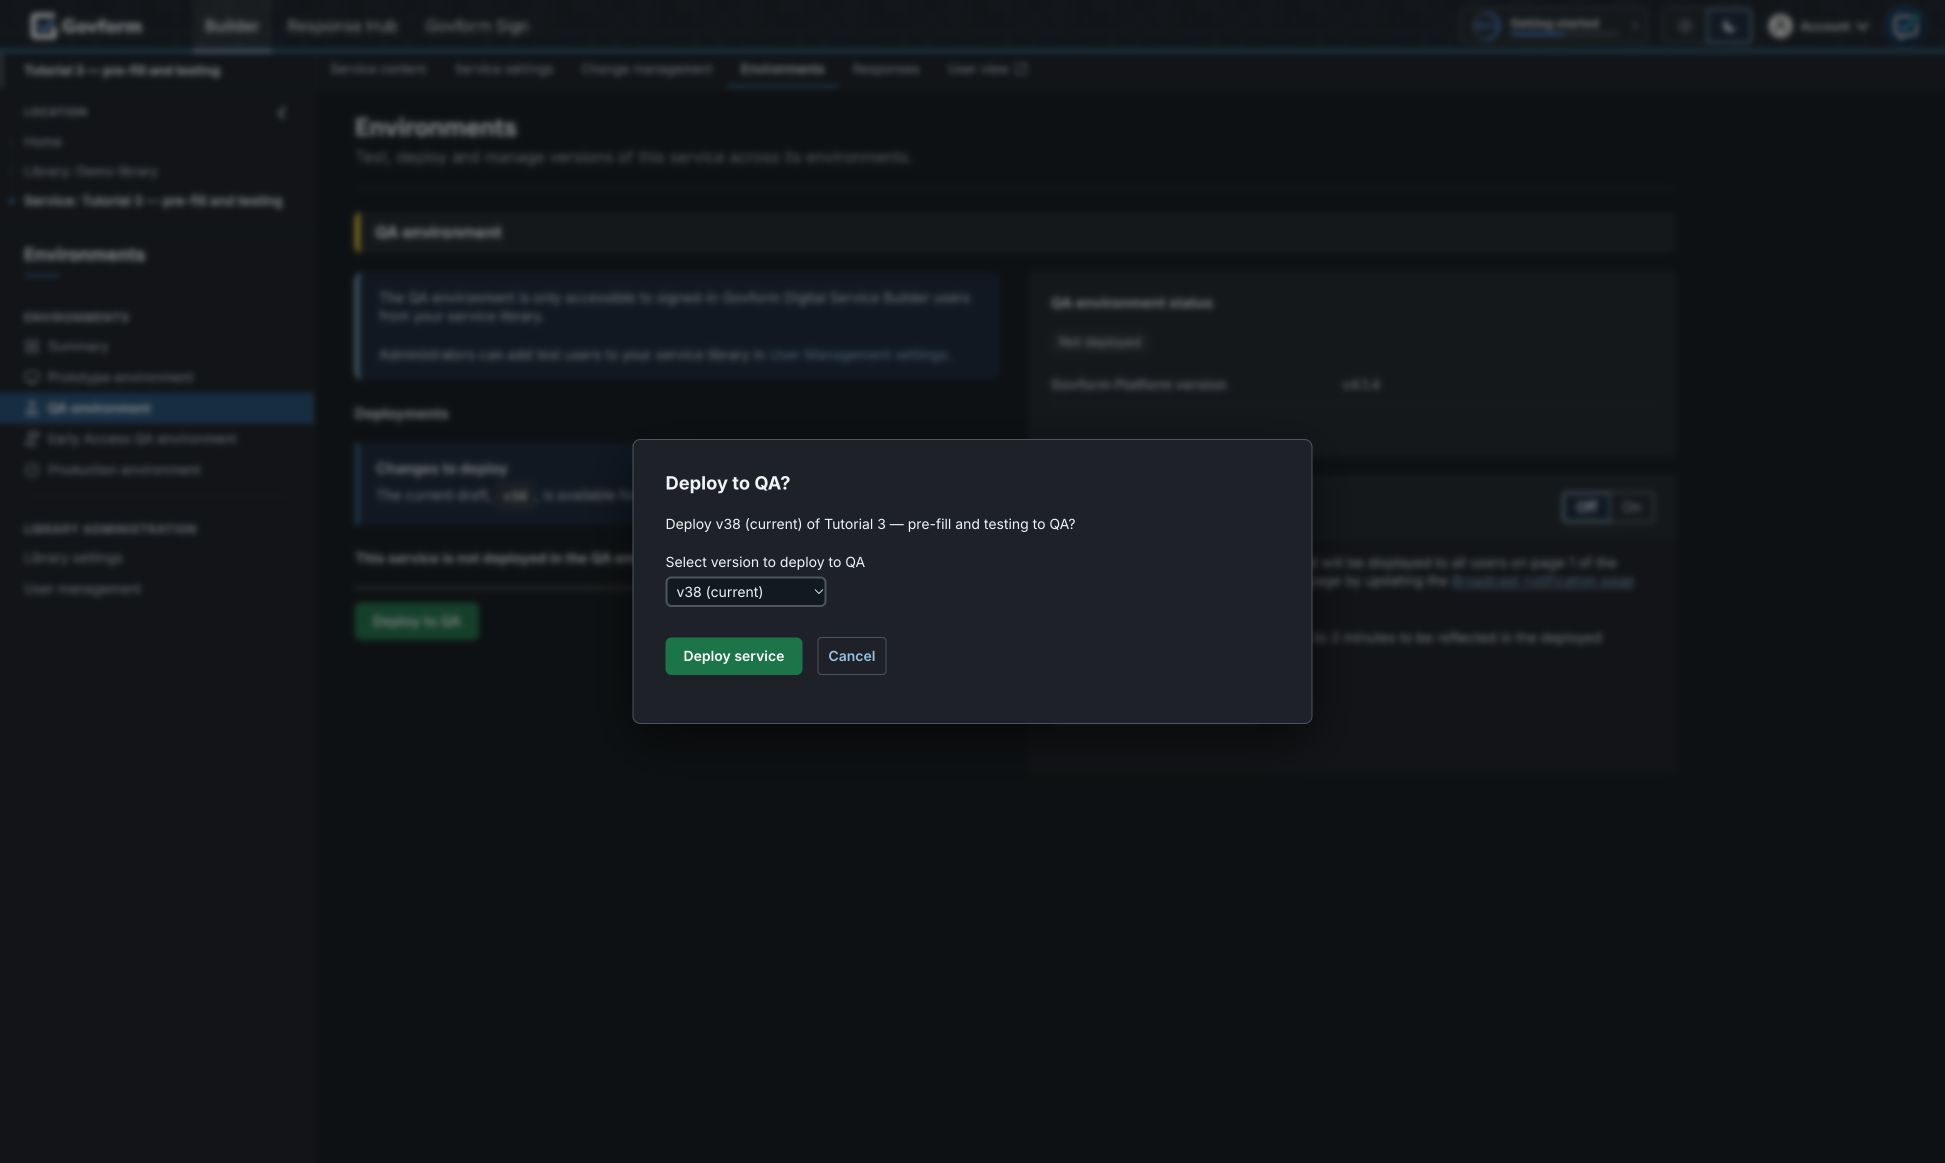
QA requires Govform sign-in and access to the library, including the External QA tester role where appropriate. User view simulates integrations; real email, API and other integration tests belong in QA with suitable test destinations. The tutorial service has no real expense-processing integration.
What you learned
- Duplicate a service and move a component without changing its ID.
- Pre-fill from a saved answer and validate an edited value.
- Test Liquid against journey data.
- Compare saved versions and review a deliberate QA deployment.