
Uploads and conditional page flow
Build a practice expense claim with receipt choices, amount inputs, a file upload and an exit route. Complete Get started with Govform first.
This example uses a made-up receipt policy for learning: a valid receipt must show the amount paid, purchase date and retailer’s UK VAT number. Use fictional answers and a sample file.
1. Start from a blank service
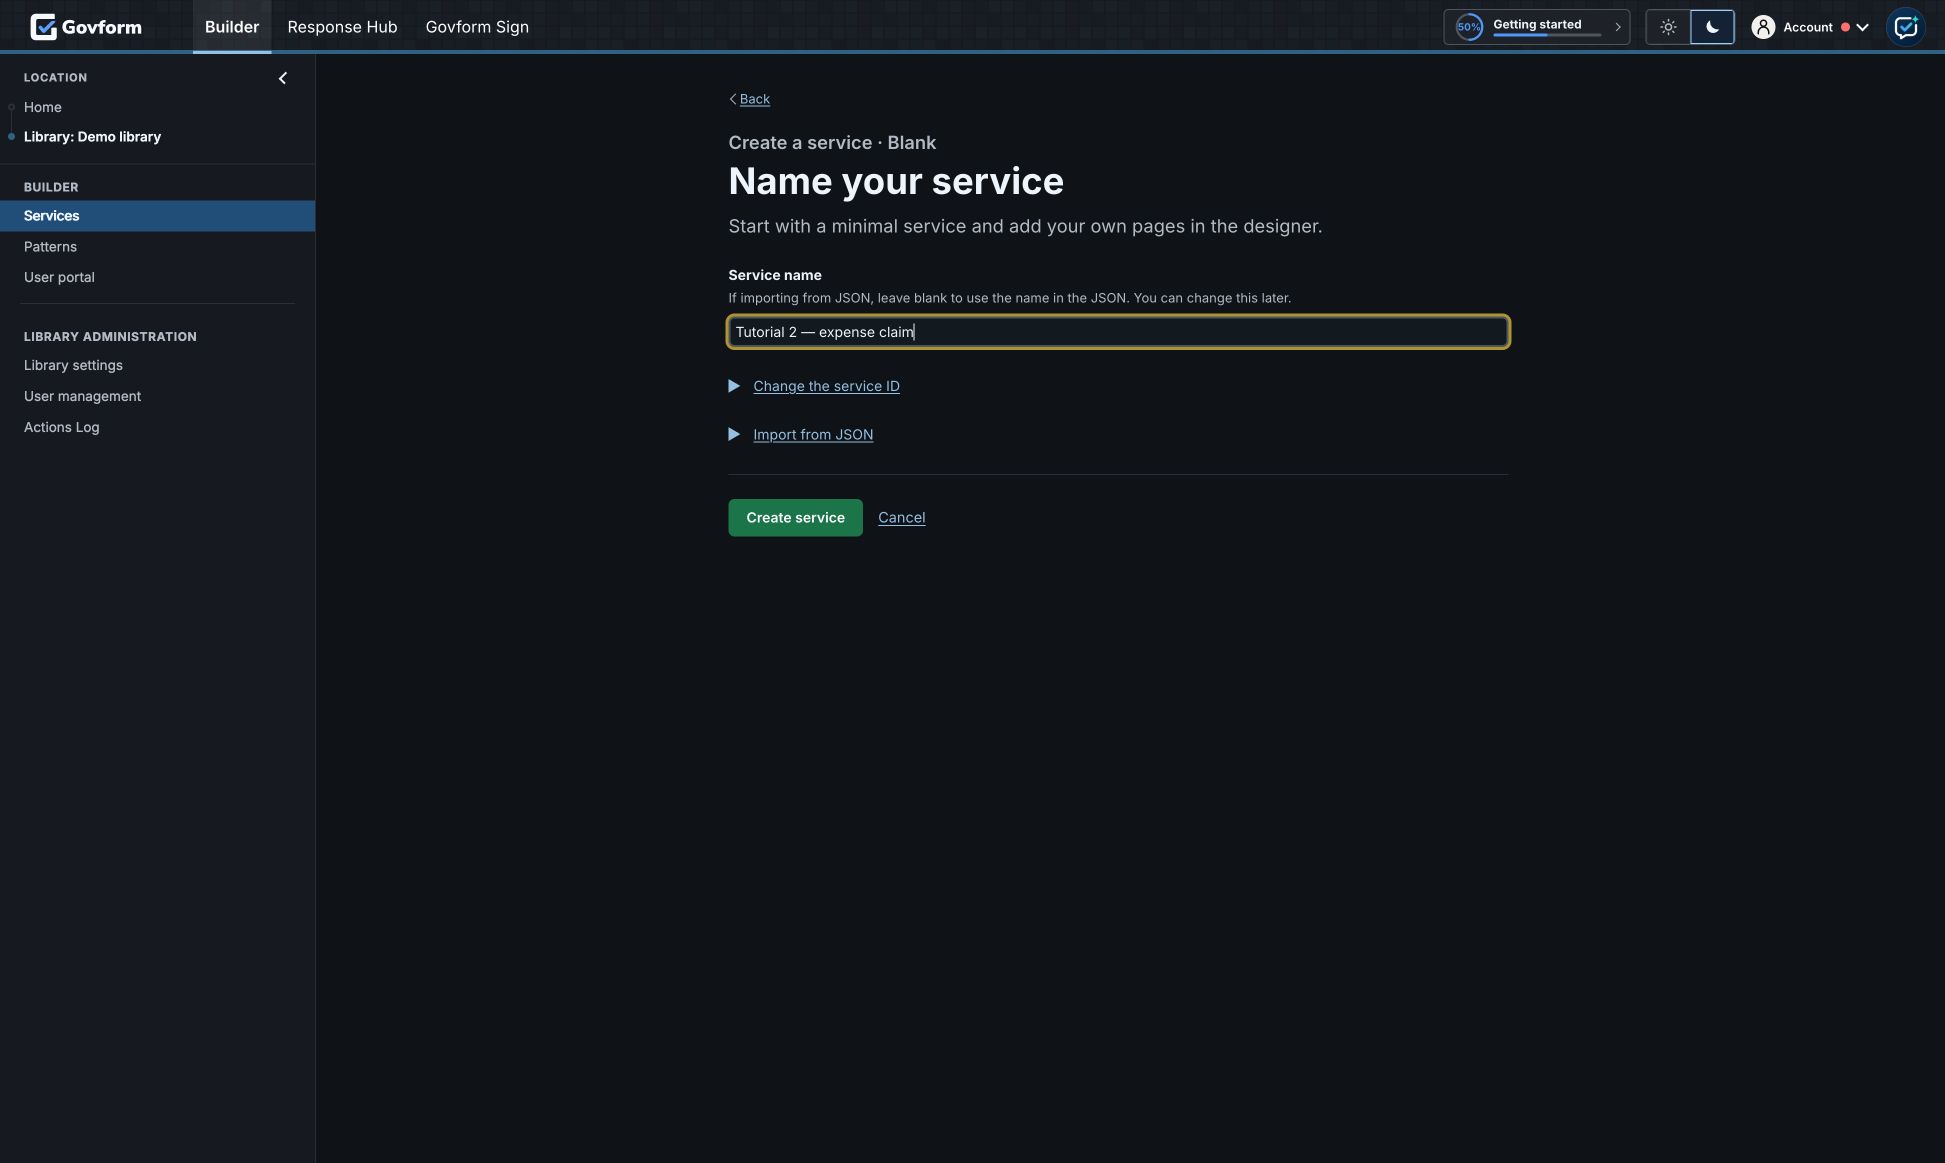
- In your library’s Services list, select Create new service → Start with a blank service.
- Enter “Tutorial 2 — expense claim” as the service name. Let Builder generate an ID, or enter your own under Change the service ID.
- Select Create service.
2. Write the introduction
Open Page 1: About this service and select its text to open Standard content settings → Content. In Text mode, explain the sample receipt requirements and that the user will enter amounts, upload a receipt and check their answers. Say that this is a practice form. Click outside the editor and wait for Saved.
3. Add the receipt question
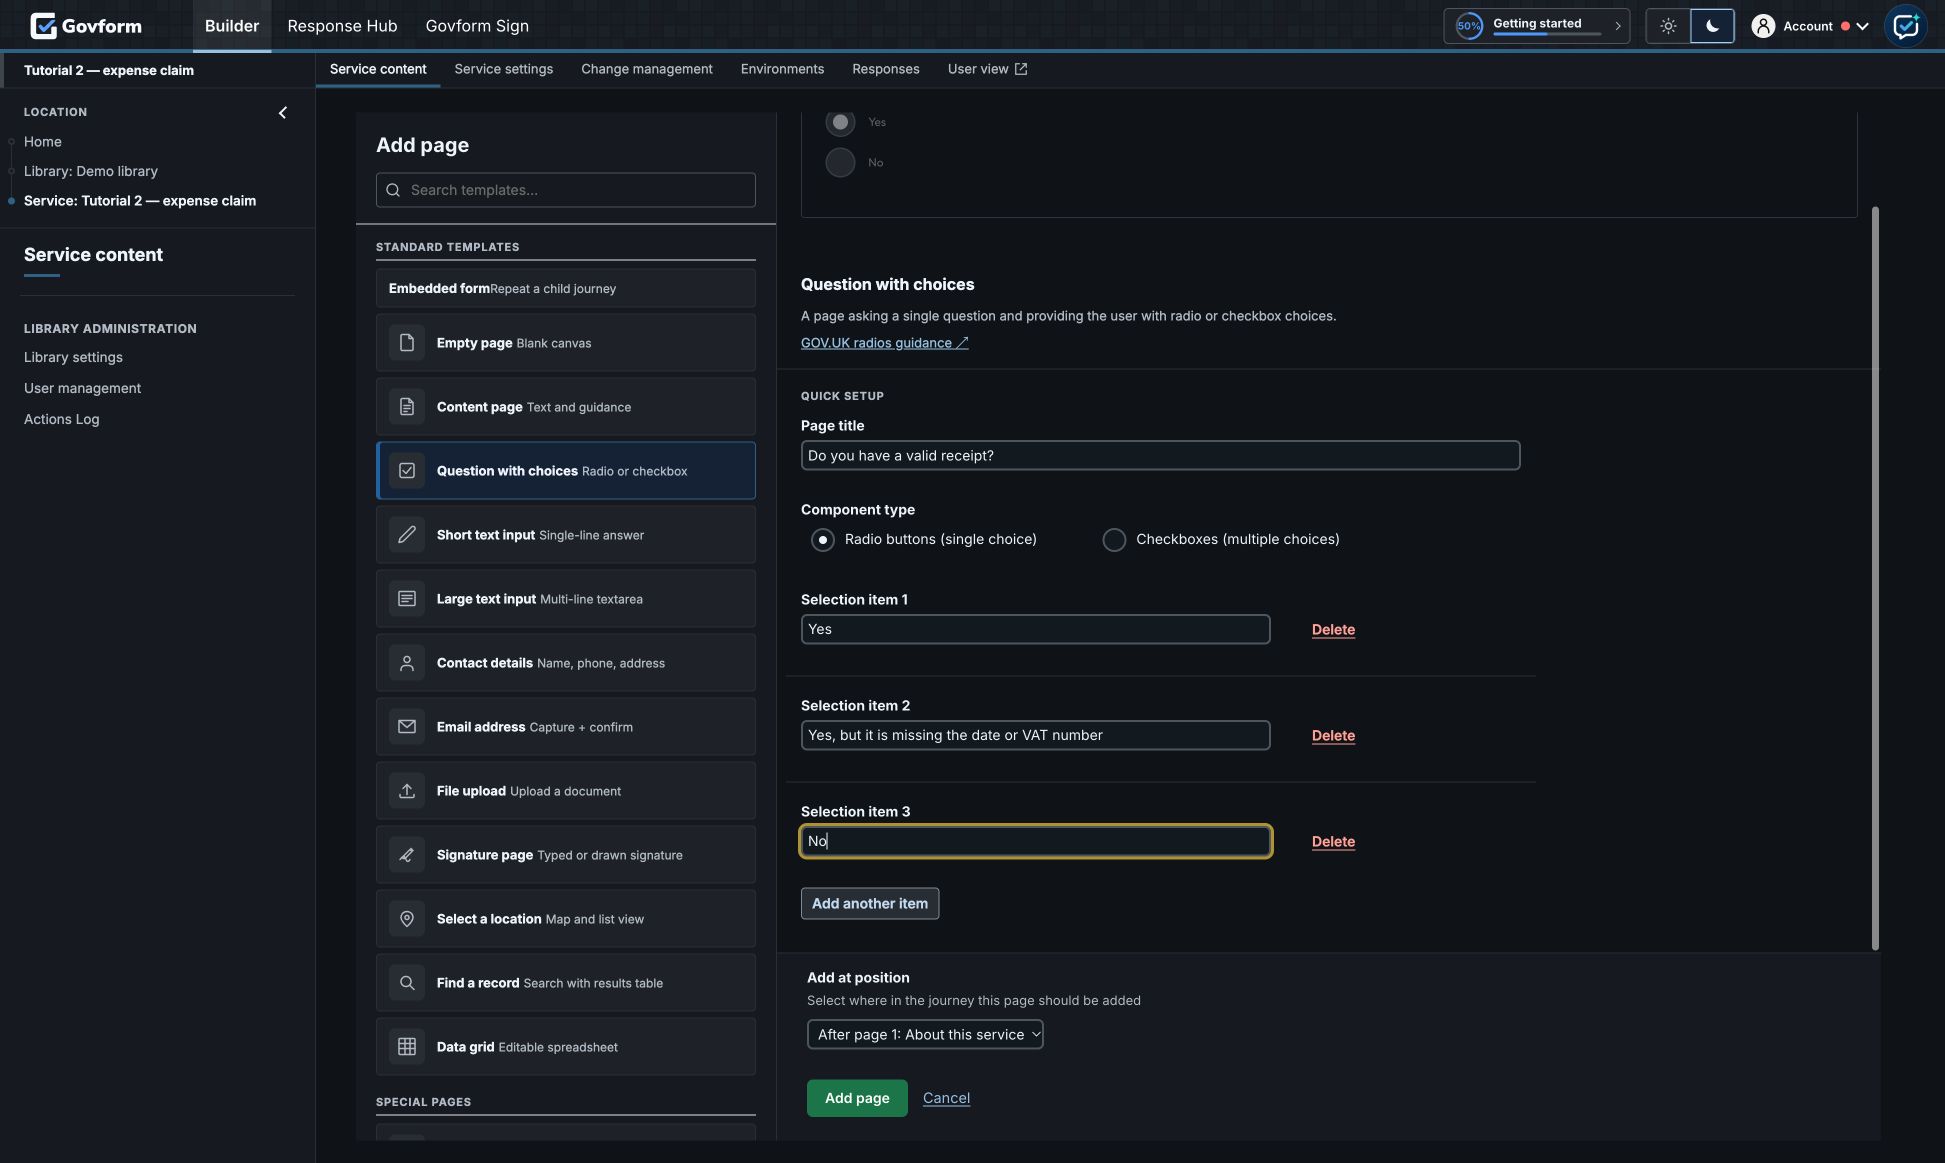
- Select Add next page. In the Add page gallery, choose Question with choices.
- Set Page title to “Do you have a valid receipt?” and keep Radio buttons (single choice).
- Set the selection items to “Yes”, “Yes, but it is missing the date or VAT number”, and “No”. Use Add another item for the third answer.
- Select Add page.
4. Add the exit route
- From the receipt question, select Add next page → Exit page. Title it “You need a valid receipt to claim”, explain the sample requirements in Content text, and select Add page.
- Open Page flow conditions under this exit page in the sidebar. Choose Only show this page when conditions are met.
- In the condition picker, choose “Do you have a valid receipt?”, select “Yes, but it is missing the date or VAT number”, and select Add selected answer.
- Select Add condition and add the same question’s “No” answer.
- Under Match, select Any condition, then Apply.
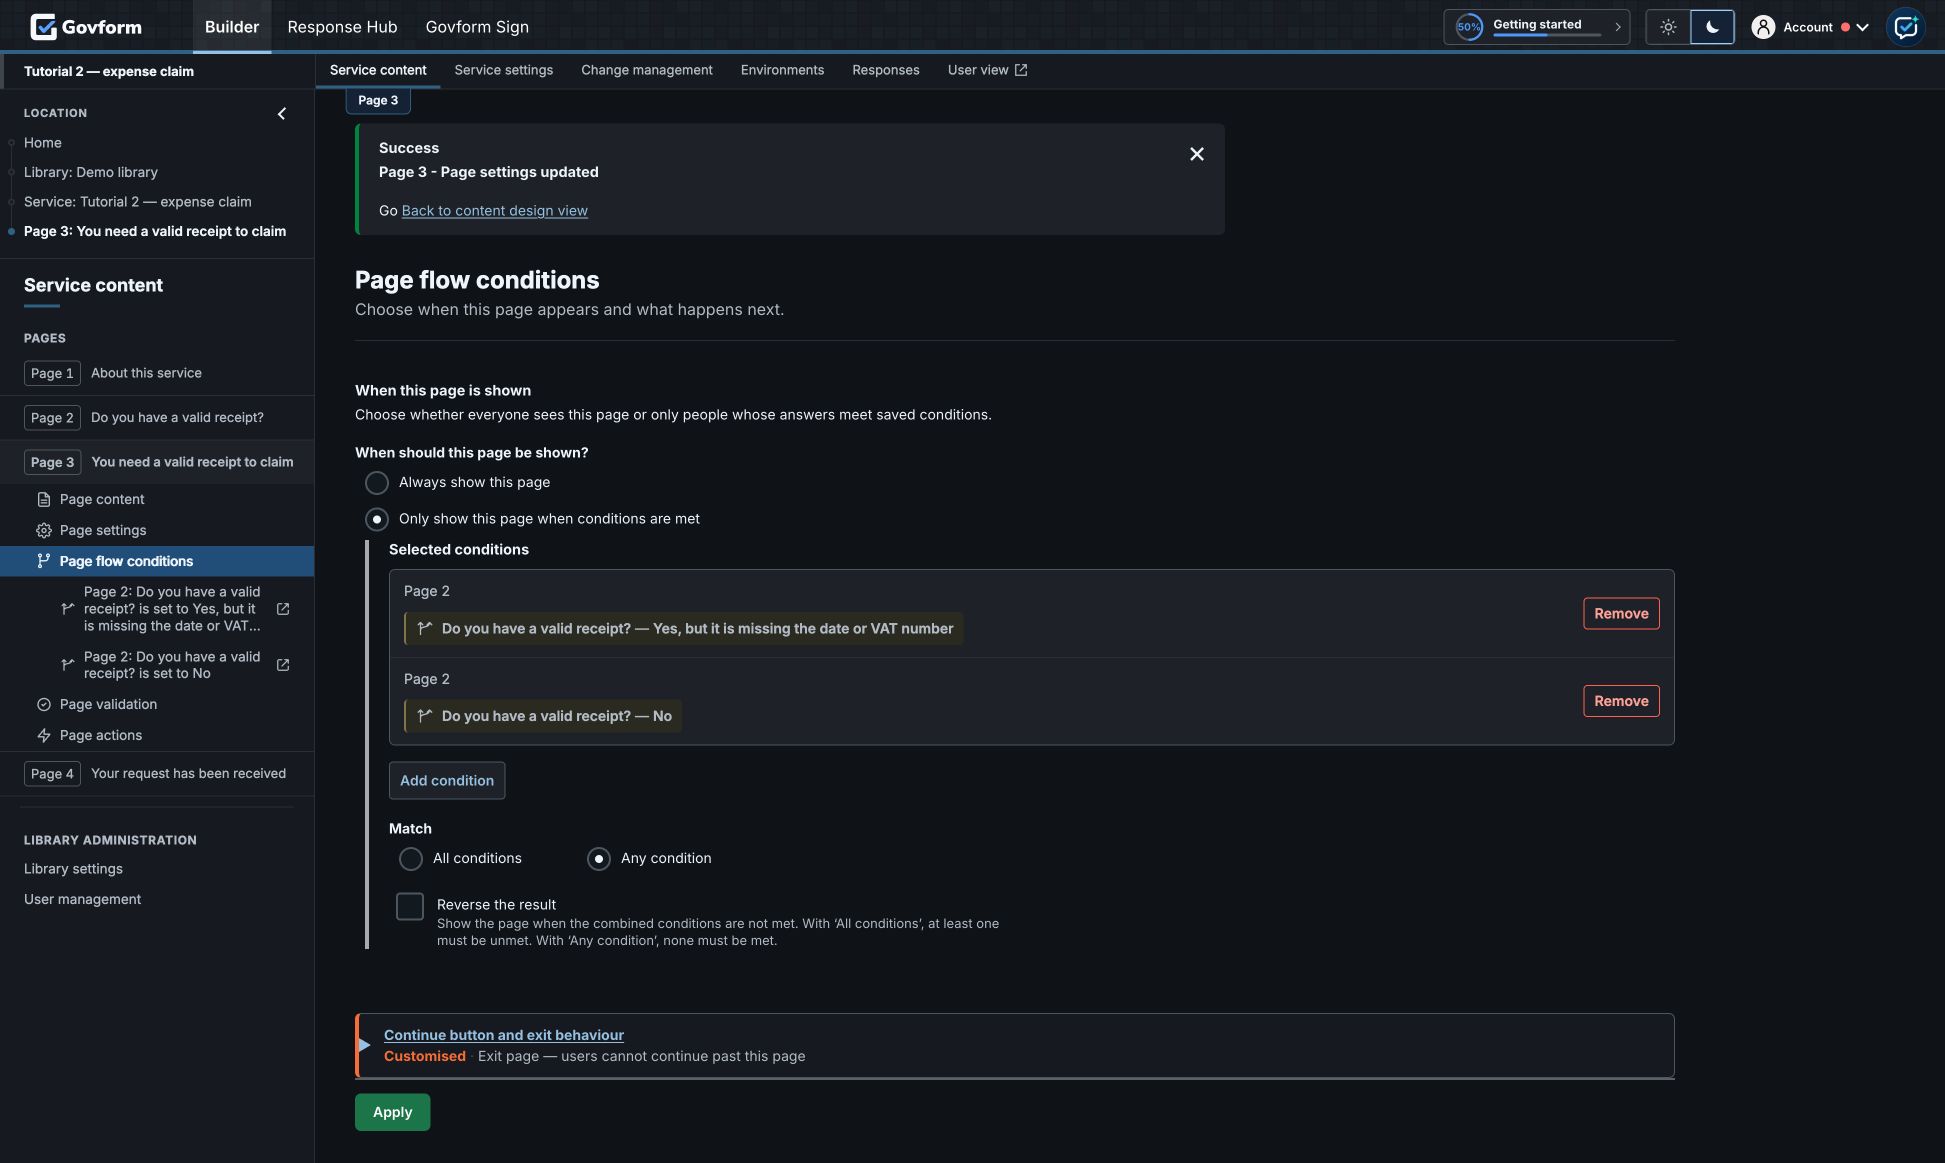
Keep the exit page immediately after the receipt question. It has no Continue button, but the user can go Back and change their answer. These are page flow conditions; component validation conditions check an answer and do not control page visibility.
5. Add claim amounts
- Open the exit page’s Page content, then select Add next page → Empty page. Title it “About your claim” and select Add page. It follows the exit page and precedes the confirmation page.
- Select Add component, find Text input in the component gallery, and set Field label to “Claim amount”. Select Add Text input. Builder generates the ID
claimAmount. - In its Content settings, change the label to “Claim amount excluding VAT” and set Content type to Numbers only. Under Display, set Prefix to
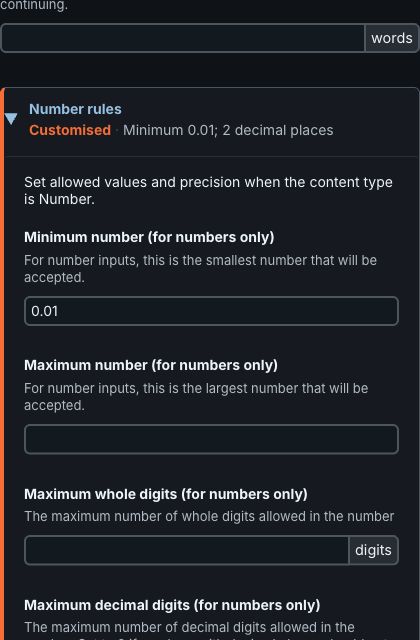
£. - Open Answer rules → Number rules. Set Minimum number to
0.01and Maximum decimal digits to2. - Add a second Text input labelled “VAT amount”. Set its content type to Numbers only, prefix to
£, minimum number to0and maximum decimal digits to2. - In the VAT component’s Content → Developer details, set Field ID to
vatAmountexactly. The automatically generated ID may use different capitalisation. Keep both answers mandatory and wait for changes to save.
These are tutorial limits. The claim amount is excluding VAT, so the next tutorial can demonstrate a simple percentage calculation without treating a VAT-inclusive total as the base amount.
6. Add the receipt upload
- From “About your claim”, select Add next page → File upload, enter “Upload your receipt”, then select Add page.
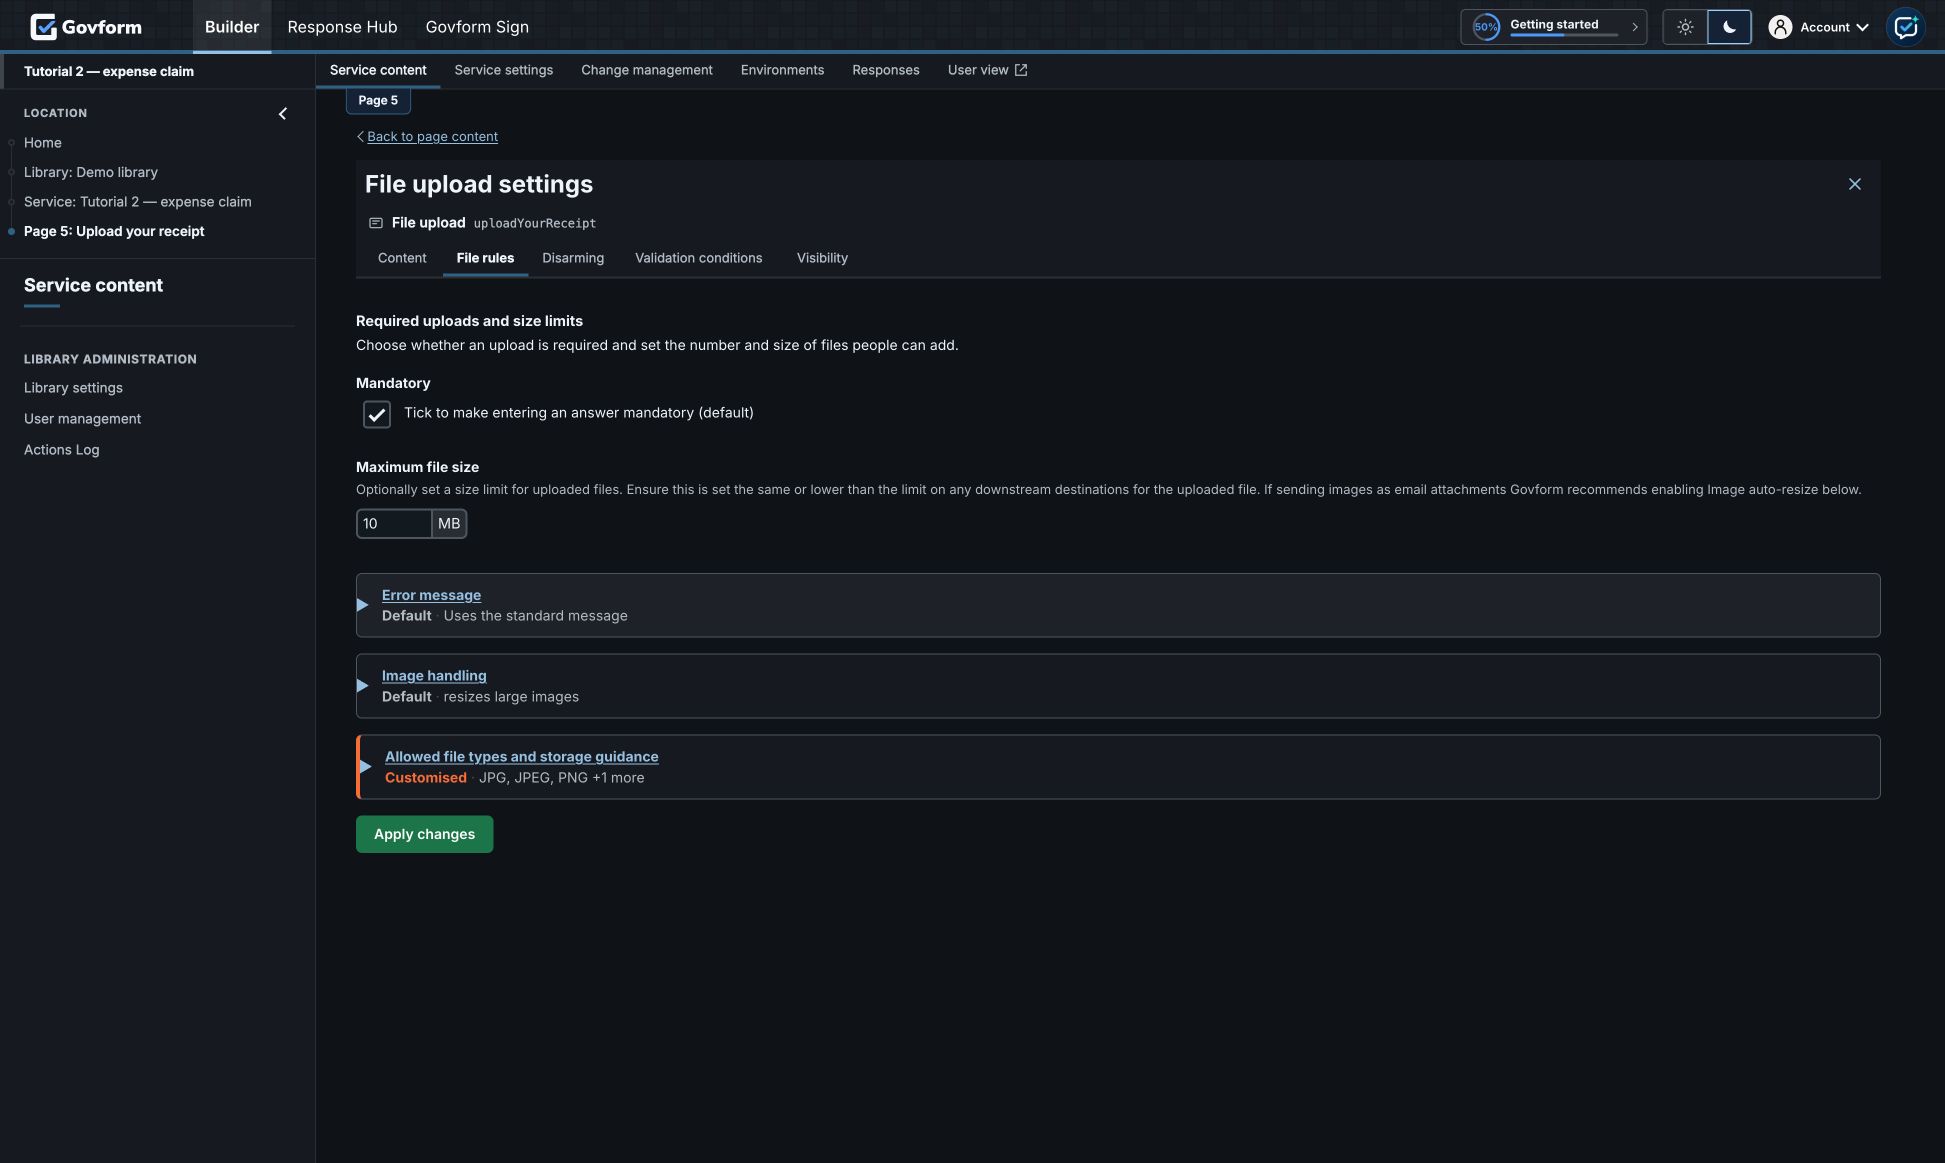
- Select the upload component to open File upload settings. In Content, clear the repeated “Upload a file” label. Set the hint to “Upload one JPG, JPEG, PNG or PDF file, no larger than 10 MB. Use a sample receipt for this tutorial.”
- Open File rules. Keep the upload mandatory and set Maximum file size to
10MB. - Expand Allowed file types and storage guidance. Enter
.jpg,.jpeg,.pngand.pdfin separate file-type entries, using Add another file type. Wait for the settings to save.
A real service’s limit must also suit its file store and any destination receiving the file. See File upload settings for storage and processing options.
7. Add review and confirmation
- From the upload page, select Add next page → Check your answers. Use “Check your answers” as the title and select Add page.
- Select the page’s Submit button in the designer, or open Page settings. Set Continue button text to “Submit claim” and select Apply.
- Open the existing final page, “Your request has been received”. Select its title, change it to “Your claim has been submitted”, and select Apply update.
- Edit its Standard content to explain that this is a tutorial submission and no real expense claim will be processed. Keep the reference-number component. Do not add another End page: a blank service already has one.
8. Test every route
Open the service overview using its name in the Location trail, then check Flow. The two invalid answers should lead to the exit; “Yes” should reach the amounts, upload, review and confirmation pages.
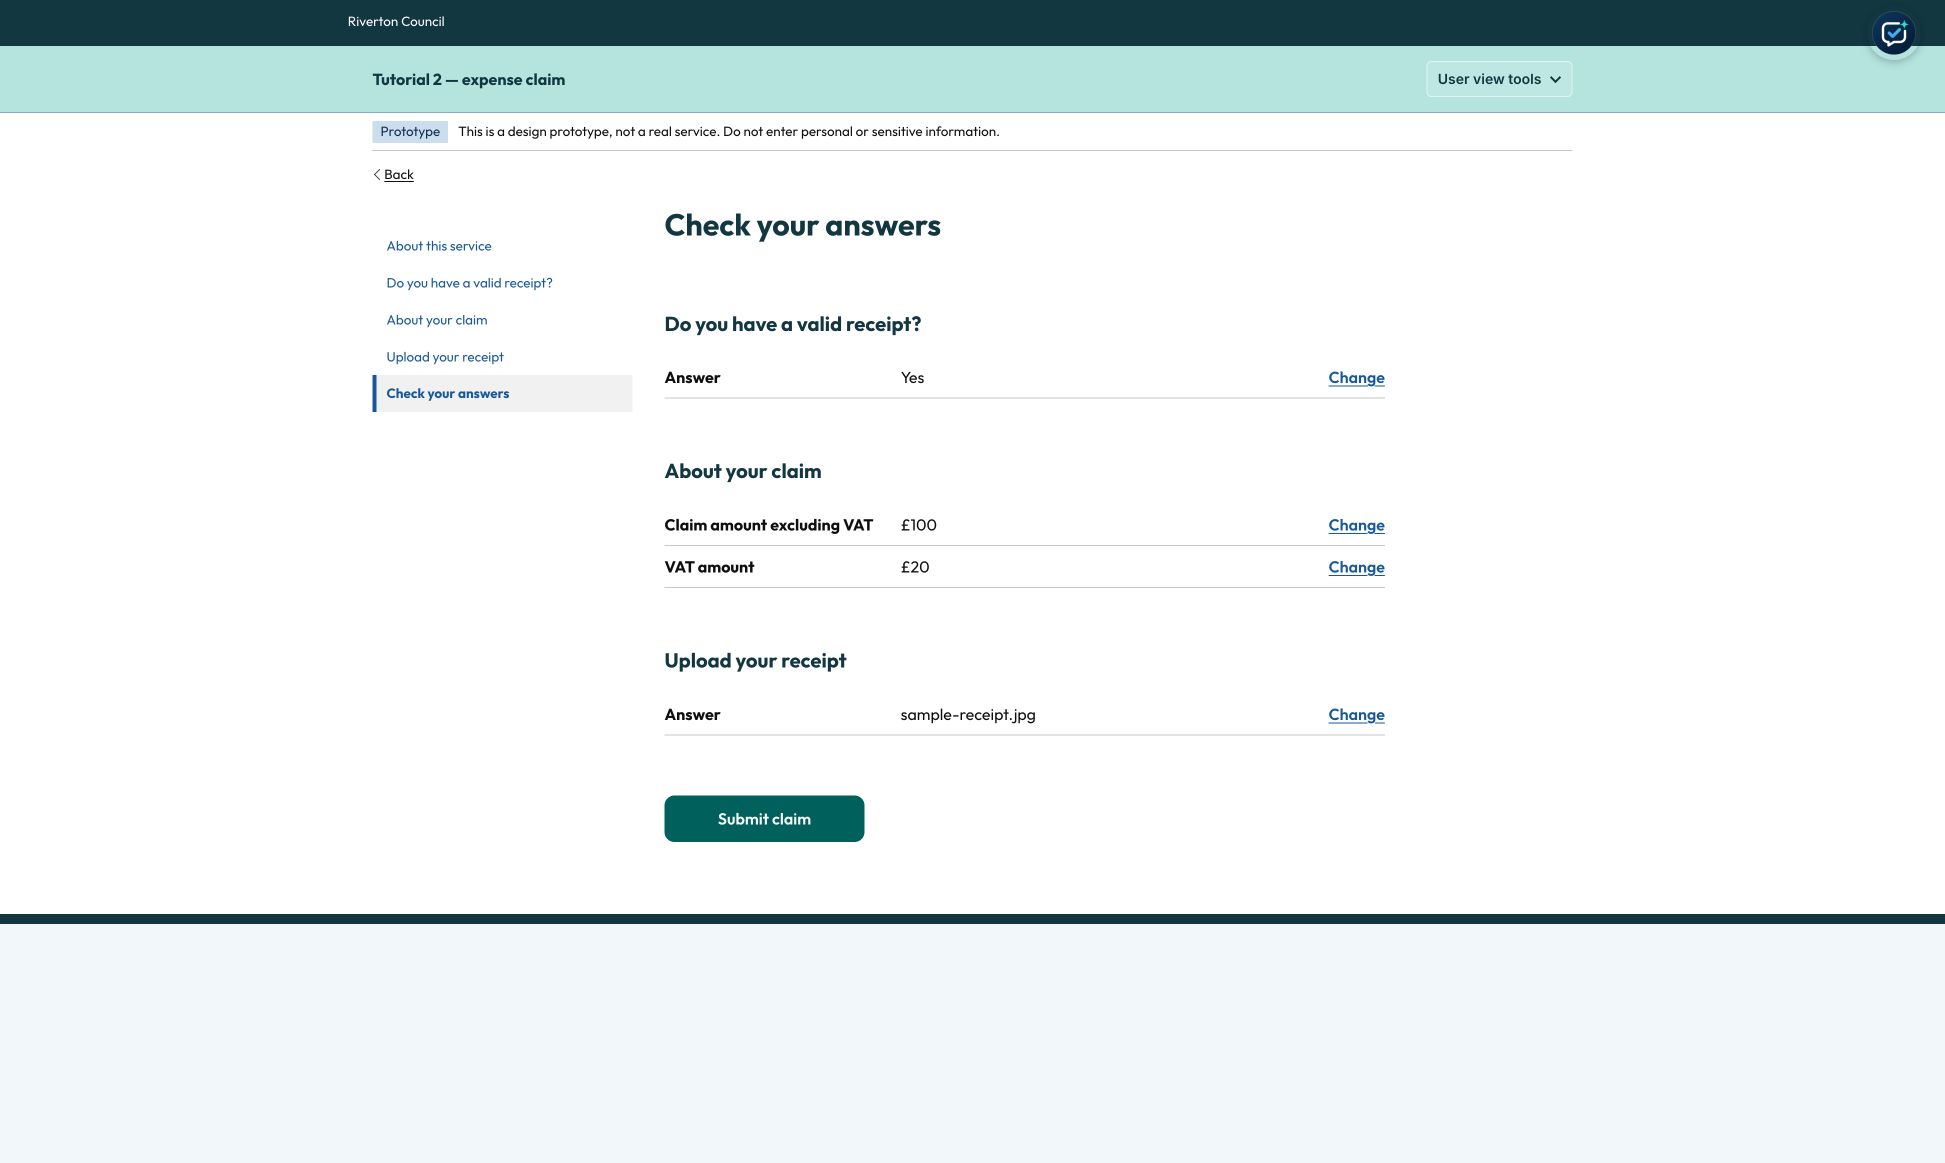
In User view, test all three receipt answers. On the exit page, use Back to change to “Yes”. On the successful route, try a blank amount, 100.001, an unsupported text file, and files just below and above 10 MB. Then enter 100 and 20, upload an accepted sample, check the Change links and select Submit claim.
What you learned
- Use the page and component galleries.
- Join exit conditions with Any condition.
- Configure numeric and upload validation with stable field IDs.
- Reuse the confirmation page and test a complete journey.
Continue with Pre-population, validation and testing.